Please note: If you are looking for a Windows PC based system you should look here
A small Motor Controller
The motors can be turned on and off as well as change their direction. This requires four control lines. The other four lines are available for switches or other purposes. The relays I picked for this board happened to be in my junk box and can carry up to 1A. Other relays can of course be used, but be warned. I could not find very many 5V relays. Some 6V relays are suitable, but they are at the limit of their design. Some will work correctly, others will just move a bit but not make contact because the voltage is too low.
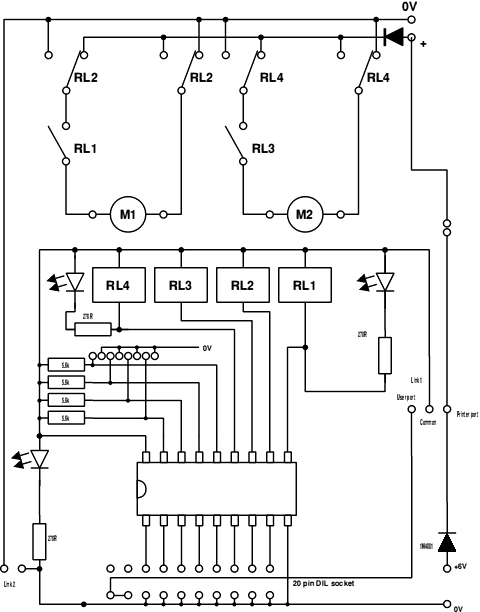
Other circuits are possible, but this one makes it easy to fit an indicating LED and has comitted lines for on/off and left/right. A refinement might be to fit two-colour LEDs and show to show on/right - on/left, with one indicator.
Below is a proposed PCB layout in gif format. If you have an Acorn computer, download the draw file here. The pinout of the relays I used is rather peculiar, so if you use your own, the layout will have to change somewhat. The built circuit is below the pcb.


I have written a small program which will demonstrate the operation of the board. it is called MotorCon and you can find it on the pd section of my site or click here. At a later date I plan to include a programming feature so that you can drop a script file onto the program which will then drive your motors accordingly.
As usual, if you have any problems send me an e-mail and I will do my best to help you.